
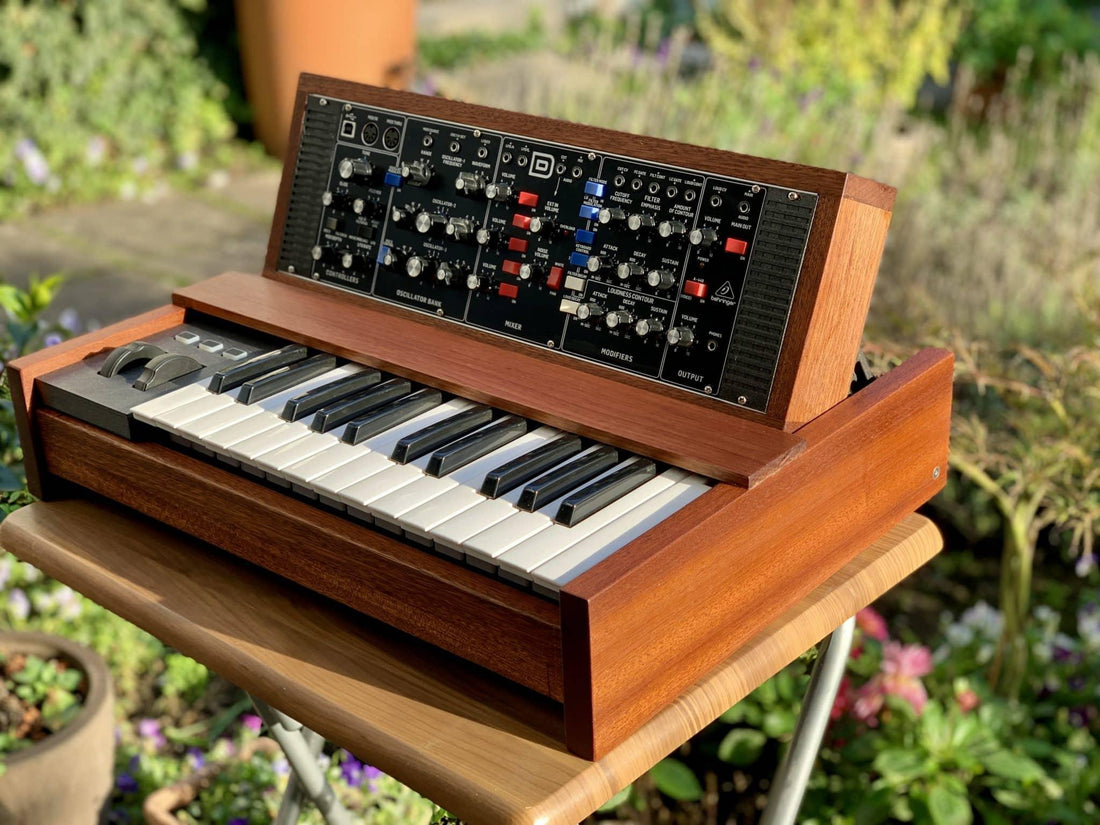
Having bought a Behring Poly D and not really having the time anymore to focus on wood works, I'm currently building my last and final Mini Model-D based on the Behringer Model-D with an Alesis Q25 Keyboard .
Same as for my previous builds I'm using mahogany wood which will be sanded and waxed with natural Australian Wood Wax . The wax provides a really nice and smooth surface while accentuating the texture of the wood.
So far, I finished today the main construction which needs to be sanded tomorrow before the assembling and waxing.
something new
What's new compared to my previous Mini Model-D builds is the fully 3D printed pitch-bend and modulation wheel section and the thicker side panels. All in all it's quite a sold and heavy little synth.
Since I want to have a cable free front panel and since the Model-D Synth will remain in the case (I've sold previous cases without the Model-D), I've soldered a Midi cable on the PCB that I don' t need to plug in a cable on the front panel. The Midi cable will be connected to the keyboard directly from the backside of the synth.
Main Raw Construction Ready
Next steps
- sanding
- waxing
- connecting the cables
- mounting the 3D printed back panel of the keyboard
- adding the piano hinge
- cutting the Model-D back panel
- mounting the 3D printed back panel for the Model-D
- printing and mounting hinges and feet
- printing left and right blind panels
- cutting and fixing the top panel which covers the gap and piano hinge
Updated 04/03/2021
The dirty work of sanding is done as well as the waxing of the case. Piano hinges are mounted and the top panel is also in place:
Updated 07/03/2021
All works completed. The case is ready and photos have been added to the gallery.